So that's what I did, and here is the result!
I copied what I knew about sewing and draw-strings, and I was able to come up with what I was looking for! The best thing about these, is that they're small enough to use up some of those old scraps! This is my very first sewing tutorial, so bear with me, if you please! :)
 |
| I'm using mine for jewelry. |
- Scrap fabric, at least 10" x 12". I used cotton.
- Matching ribbon, no wider than 3/8". Most of the ribbon I used was 1/4" width.
- Matching thread.
- Safety pin.
- Some printer or tissue paper (to make the pattern).
- Your usual sewing supplies. Scissors, sewing machine, pins, steam iron, etc. You'll also need a seam gauge.
- (Optional) Waterproof glue (to secure the knots).
Got that? Let's move on to the first step!
1. Make your pattern. I just used a paper cutter from Fiskars, but you can use a ruler and a pencil to draw a 4 1/2" by 6" rectangle out of your tissue paper. This will be your pattern. The tissue paper works better because it's not as stiff as printer paper.
When you've got your pattern all made, go ahead and pin it to your fabric, close to the selvage if possible, but if that's not possible with the shape of your scrap fabric, then it's ok. The pouches are too small to make much of a difference.
 |
| The right side is facing up, and the fabric is NOT doubled. |
2. Cut it out, and then pin it again to cut out another one. So now you have two rectangles. Fold your tissue paper pattern neatly and put it in an envelope marked "Pouch Pattern" on it to use again later.
3. On the 4 1/2 inch edge, with the right side of the rectangle facing down, press the edge down at 1/4".
 |
| Do this with the other 4 1/2" edge as well. |
Sew along the fold, at about 1/8 inch.
 |
| Like this. |
Do the same thing for both rectangles.
 |
| So now you have this. |
4. Now, you're basically going to do the same thing with the longer edges. So it looks like this:
5. Using your seam gauge, and with the right side facing down on the table, press the 4 1/2 inch edge down 3/4 inch. Then you're going to sew along the seam. I put a dotted line where you're supposed to sew to make it easier.
 |
| Sew along the dotted line. |
You want it sewn so that you can stick a pencil through the top.
This is where you're ribbon is going to go through. Do this with both of your rectangles.
6.Now you're going to sew the two rectangles together. With the right sides together, sew all along the edges, but don't go over your ribbon openings. Here are some more dotted lines to indicate where you should sew.
When you're through with sewing, you can turn it inside out.
You're almost done! Just the ribbon now.
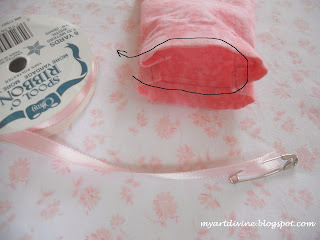
With a safety pin attached to the end of your ribbon, shove it into one of the openings, until it comes out the opposite hole, so that you have two ends of ribbon right next to the other.
Now tie it in a knot.
And you can use a little waterproof glue to keep the knot in place.
Do the same thing on the other side, tie it, and you are all done!
You can make like 10 of these in less than an hour, to use for almost anything little. Mints, coins, thumb drives, jewelry, hair things, anything.
Thank you for bearing with me in this tutorial. I promise I will keep getting better at blogging, so that my instructions will be easier to understand. I hope you like your pouches!
Thanks for reading this! I'll be back with more stuff to show you soon!
-Phoebe


Oh, I love making drawstring bags! At present I have more than enough for my necklaces, earrings, and rings, but I think I will be making another...
ReplyDeleteThe material you used for the example pouch is really pretty, btw!
Thanks, Diana! :D I hope you have fun making some! :D
ReplyDelete